![]()
Polylux
Polylux is a package for the typesetting system Typst to create presentation slides, just like you would use the beamer package in LaTeX. (So far, it is much less advanced than beamer, obviously.)
If you haven't heard of things like LaTeX's beamer before, here is how this works: As a rule of thumb, one slide becomes one PDF page, and most PDF viewers can display PDFs in the form of a slide show (usually by hitting the F5-key).
Polylux gives you:
- Elegant yet powerful typesetting by the ever-improving Typst.
- Fully customisable slides.
- Dynamic slides (or overlays or (dis-)appearing content, or however you want to call it).
- Some templates to get you up to speed quickly.
If you like it, consider giving a star on GitHub!
Why the name?
A polylux is a brand of overhead projectors very common in Eastern German schools (where the main author of this package grew up). It fulfils a similar function to a projector, namely projecting visuals to a wall to aid a presentation. The German term for projector is beamer, and now you might understand how it all comes together. (The original author of the aforementioned LaTeX package is German as well.)
About this book
This book documents all features currently implemented in Polylux.
Specifically, it describes the state of the package as it is pulished to the
Typst package registry.
The main branch of the Polylux repository may contain features not documented
here.
Contributing
This package is free and open source. You can find the code on GitHub where you can also create issues or pull requests.
License
Polylux is released under the MIT license.
Getting started
You can find this package in the official Typst package repository. To use it, start your document with
#import "@preview/polylux:0.4.0": *
You now have two options:
- start from one of the templates, or
- start from scratch.
We will choose the second option for this tutorial. Let's start with the absolute minimal effort. What characterises a set of slides? Well, each slide (or PDF page, as we already established) has specific dimensions. Some time ago, a 4:3 format was common, nowadays 16:9 is used more often. Typst has those built in:
#set page(paper: "presentation-16-9")
You probably don't want your audience to carry magnifying glasses, so let's set the font size to something readable from the last row:
#set text(size: 25pt)
We should be ready do go to create some actual slides now.
We will use the function slide for this, which is kind of at the core
of this package.
// Remember to actually import Polylux before this!
#slide[
  Hello, world!
]
And here is the result (the gray border is not part of the output but it makes
the slide easier to see here):
 Already kinda looks like a slide, but also a bit boring, maybe.
We should add a title slide before that so that our audience actually knows what
talk they are attending.
Also, let us choose a nicer font and maybe add some colour?
We modify the
Already kinda looks like a slide, but also a bit boring, maybe.
We should add a title slide before that so that our audience actually knows what
talk they are attending.
Also, let us choose a nicer font and maybe add some colour?
We modify the #set page and #set text commands for that:
#set page(paper: "presentation-16-9", fill: teal.lighten(90%))
#set text(size: 25pt, font: "Lato")
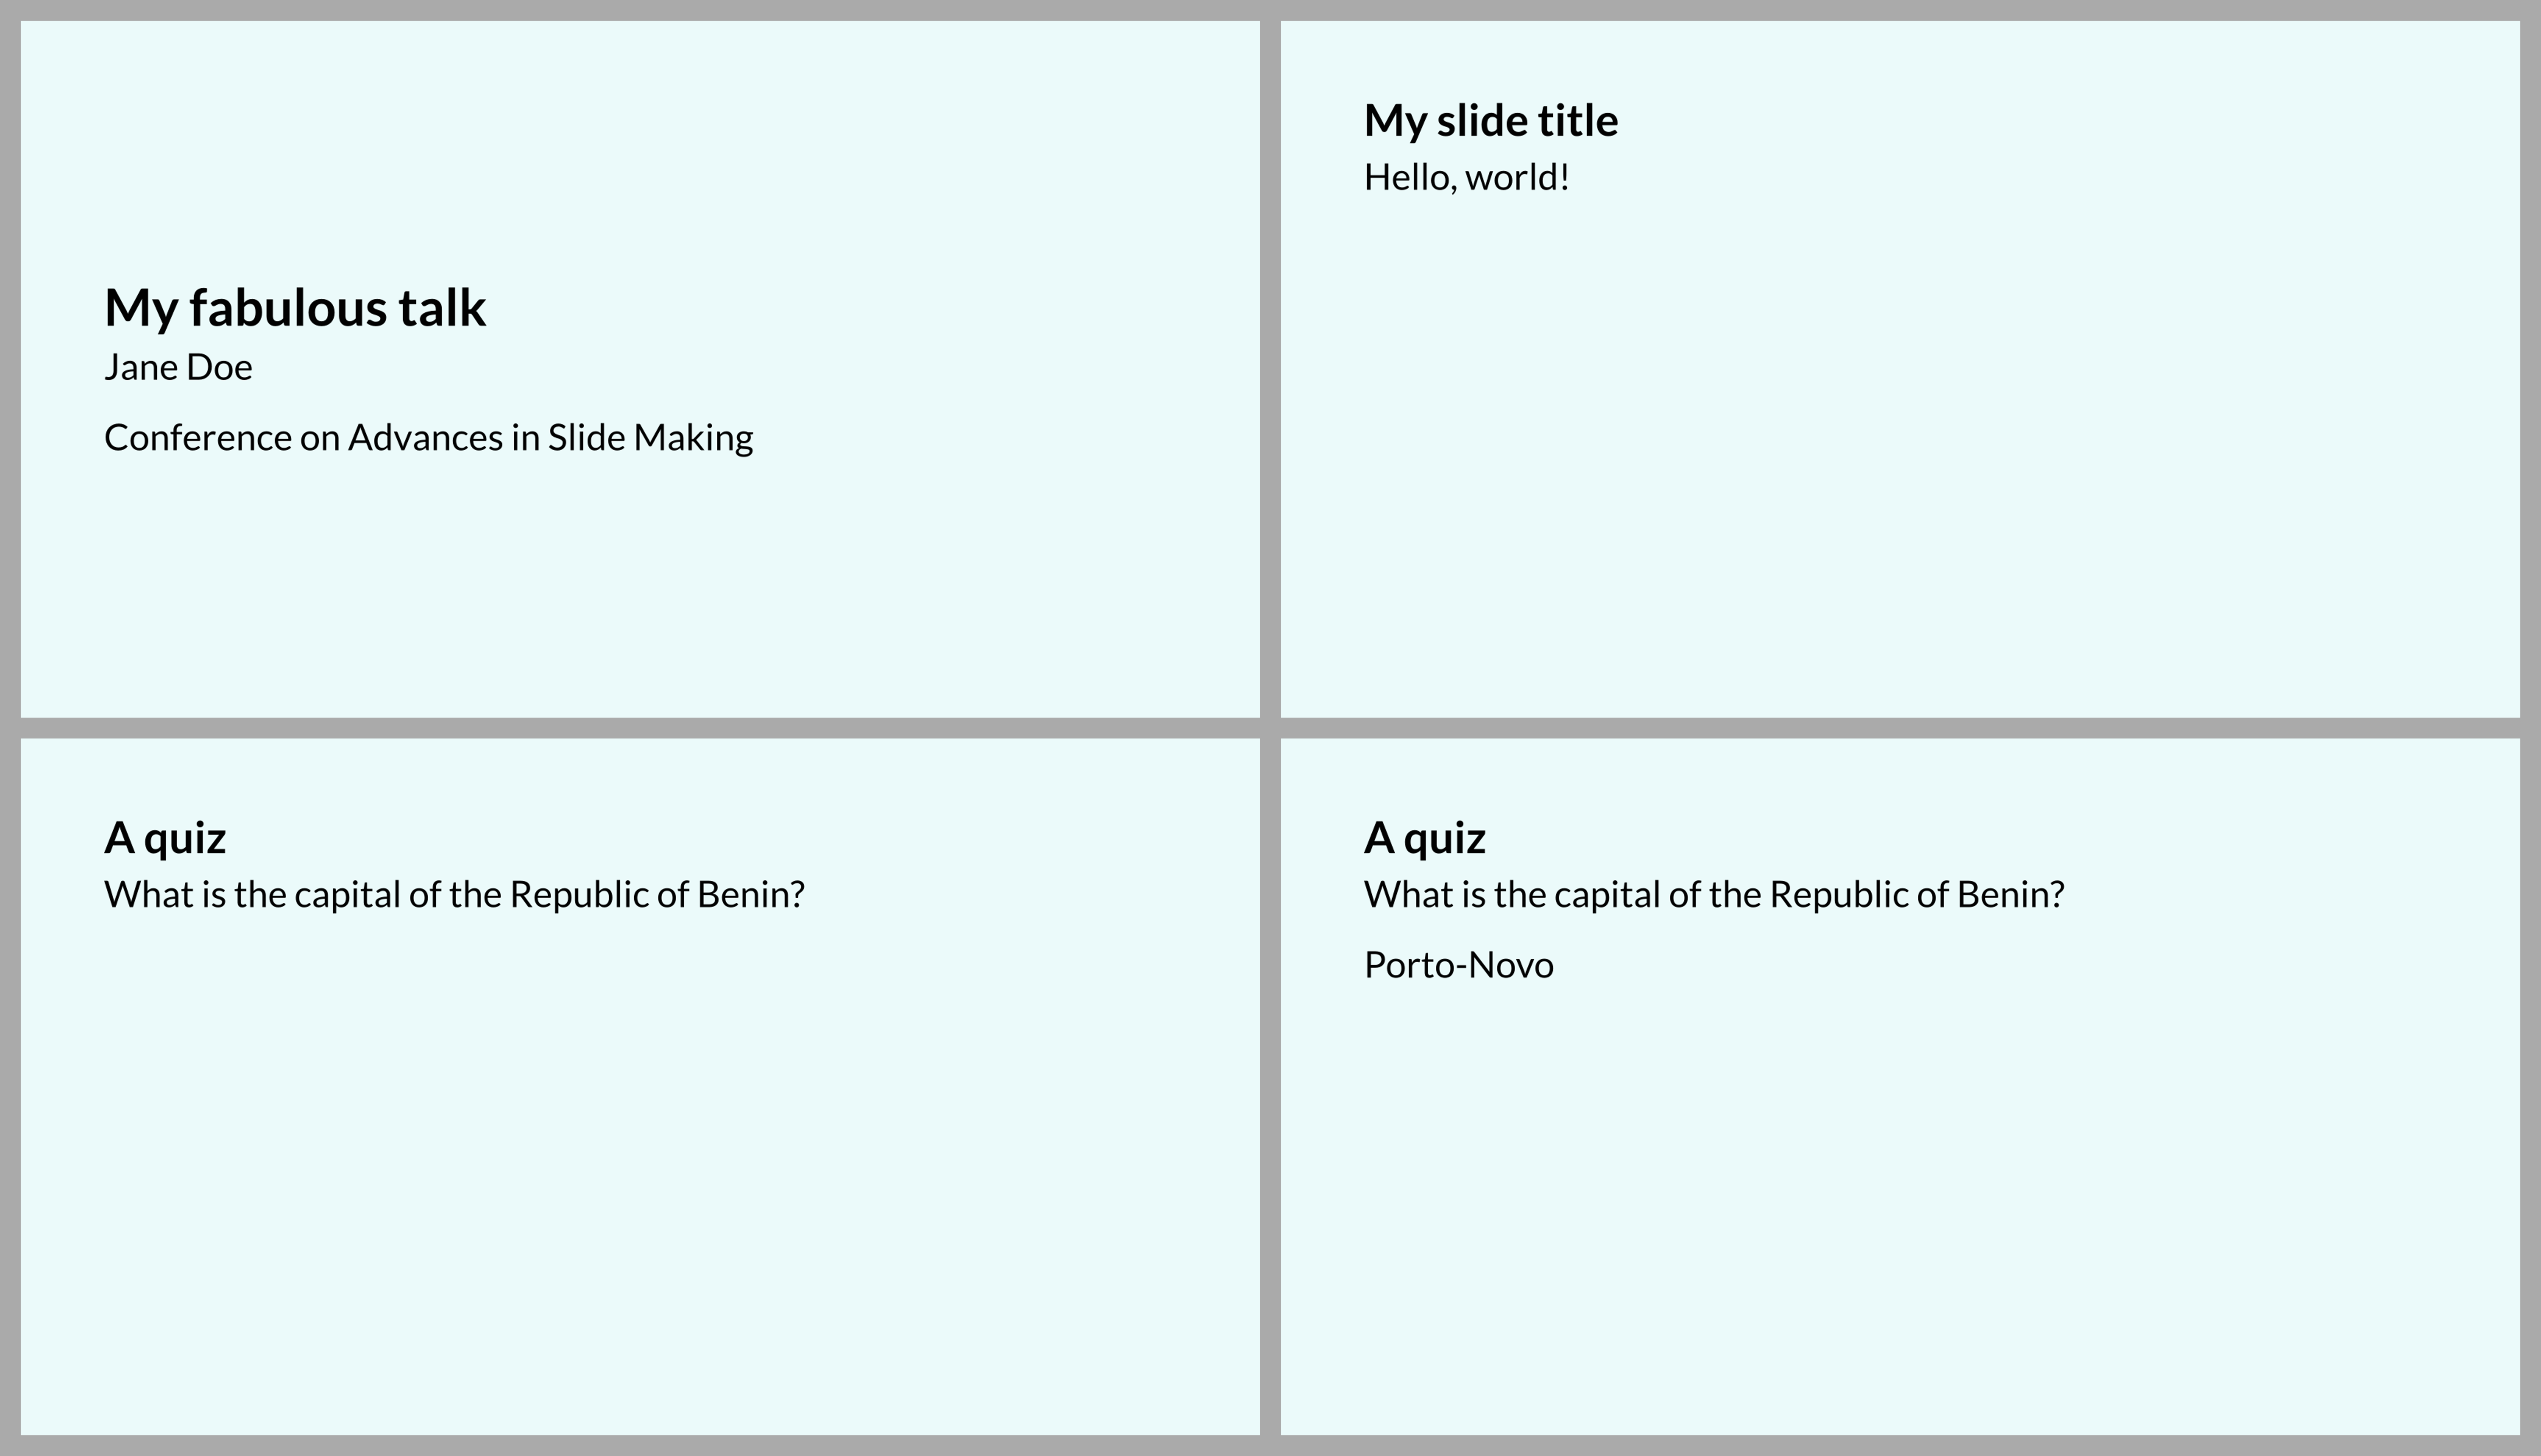
#slide[
#set align(horizon)
= My fabulous talk
Jane Doe
Conference on Advances in Slide Making
]
#slide[
Hello, world!
]
 Not bad, right?
Another thing that is usually a good idea is to have a title on each slide.
That is also no big deal by using off-the-shelf Typst features, so let's modify
our first slide:
Not bad, right?
Another thing that is usually a good idea is to have a title on each slide.
That is also no big deal by using off-the-shelf Typst features, so let's modify
our first slide:
#slide[
  == My slide title
  Hello, world!
]
This is starting to look like a real presentation:

So what?
To be honest, everything we did so far would have been just as easy without using Polylux at all. So why should you care about it?
Consider the following situation: You have a slide where parts of the content appear or disappear, or the colour of some text changes, or some other small-sized change. Would you like to duplicate the whole slide just so to create this affect? And then maintain multiple copies of the same content, making sure never to forget updating all copies when your content evolves? Of course you wouldn't and, gladly, Polylux can handle this for you.
This kind of feature is called dynamic content or overlays (loosely speaking, you might also say animations but that might be a bit of a stretch, nothing actually "moves" on PDF pages).
So how does that work in Polylux? As a quick example, let's add a little quiz to our slides:
#slide[
  == A quiz

  What is the capital of the Republic of Benin?

  #show: later
  Porto-Novo
]
 Note how two more slides have been created even though we declared only one.
The next sections will explain dynamic content in Polylux in all its details.
For reference, here is the full source code for the slides we developed in this section:
#import "@preview/polylux:0.4.0": *

#set page(paper: "presentation-16-9", fill: teal.lighten(90%))
#set text(size: 25pt, font: "Lato")

#slide[
  #set align(horizon)
  = My fabulous talk

  Jane Doe

  Conference on Advances in Slide Making
]

#slide[
  == My slide title
  Hello, world!
]

#slide[
  == A quiz

  What is the capital of the Republic of Benin?

  #show: later
  Porto-Novo
]
Dynamic slides
The PDF format does not (trivially) allow to include animations, as one would be used to from, say, PowerPoint. The solution PDF-based presentation slides use is to create multiple PDF pages for one slide, each with slightly different content. This enables us to have some basic dynamic elements on our slides.
In this book, we will use the term logical slide for a section of content that
was created by one call to #slide, and subslide for a resulting PDF
page.
Each logical side can have an arbitrary amount of subslides and every subslide
is part of exactly one logical slide.
Note that the same page number is displayed for all subslides of a logical slide.
As you will see soon, the commands for creating dynamic content all have some way of specifying on what subslides some content is supposed to be shown. One of those subslides has the highest index, of course. Of all those commands with their respective highest subslide to show something, the maximum is take again and that defines the number of PDF pages produced for one logical slide. For example, suppose we have a slide with the following commands:
- show something on subslides 1 and 3
- show something from subslide 2 to subslide 4
- show something until subslide 6
This results in 6 PDF pages for this logical slide.
In the LaTeX beamer package, the functionalities described in this part are called "overlays".
Reserve space or not?
When you want to specify that a certain piece of content should be displayed on some subslides but not on others, the first question should be what should happen on the subslides it is not displayed on. You could either want
- that it is completely not existing there, or
- that it is invisible but it still occupies the space it would need otherwise
(see the docs of the
#hidefunction)
The two different behaviours can be achieved using either #only or #uncover,
respectively.
The intuition behind it is that, in one case, content is only existing on some
slides, and, in the other case, it is merely covered when not displayed.
General syntax for #only and #uncover
Both functions are used in the same way. They each take two positional arguments, the first is a description of the subslides the content is supposed to be shown on, the second is the content itself. Note that Typst provides some syntactic sugar for trailing content arguments, namely putting the content block behind the function call.
You could therefore write:
#slide[
  before #only(2)[*displayed only on subslide 2*] after

  before #uncover(2)[*uncovered only on subslide 2*] after
]
...resulting in
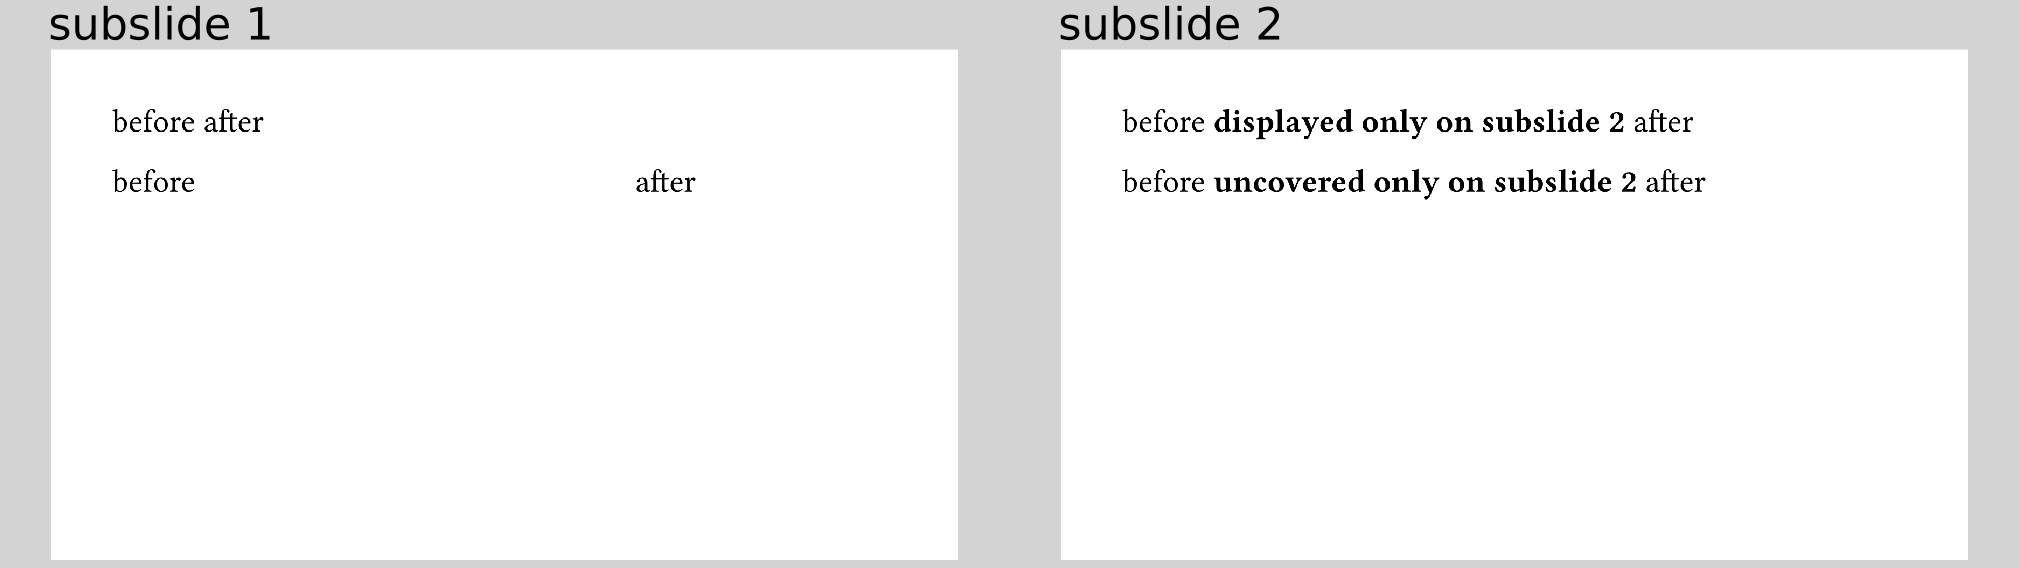
(Note again that the gray border is not part of the slides and that the labels indicating the index of the subslide are also added afterwards.)
You can clearly see the difference in behaviour between only and uncover.
In the first line, "after" moves but not in the second line.
In this example, we specified only a single subslide index, resulting in content that is shown on that exact subslide and at no other one. Let's explore more complex rules next.
Complex display rules
There are multiple options to define more complex display rules than a single number.
Array
The simplest extension is to use an array. For example
#slide[
  #uncover((1, 2, 4))[uncovered only on subslides 1, 2, and 4]
]
results in:
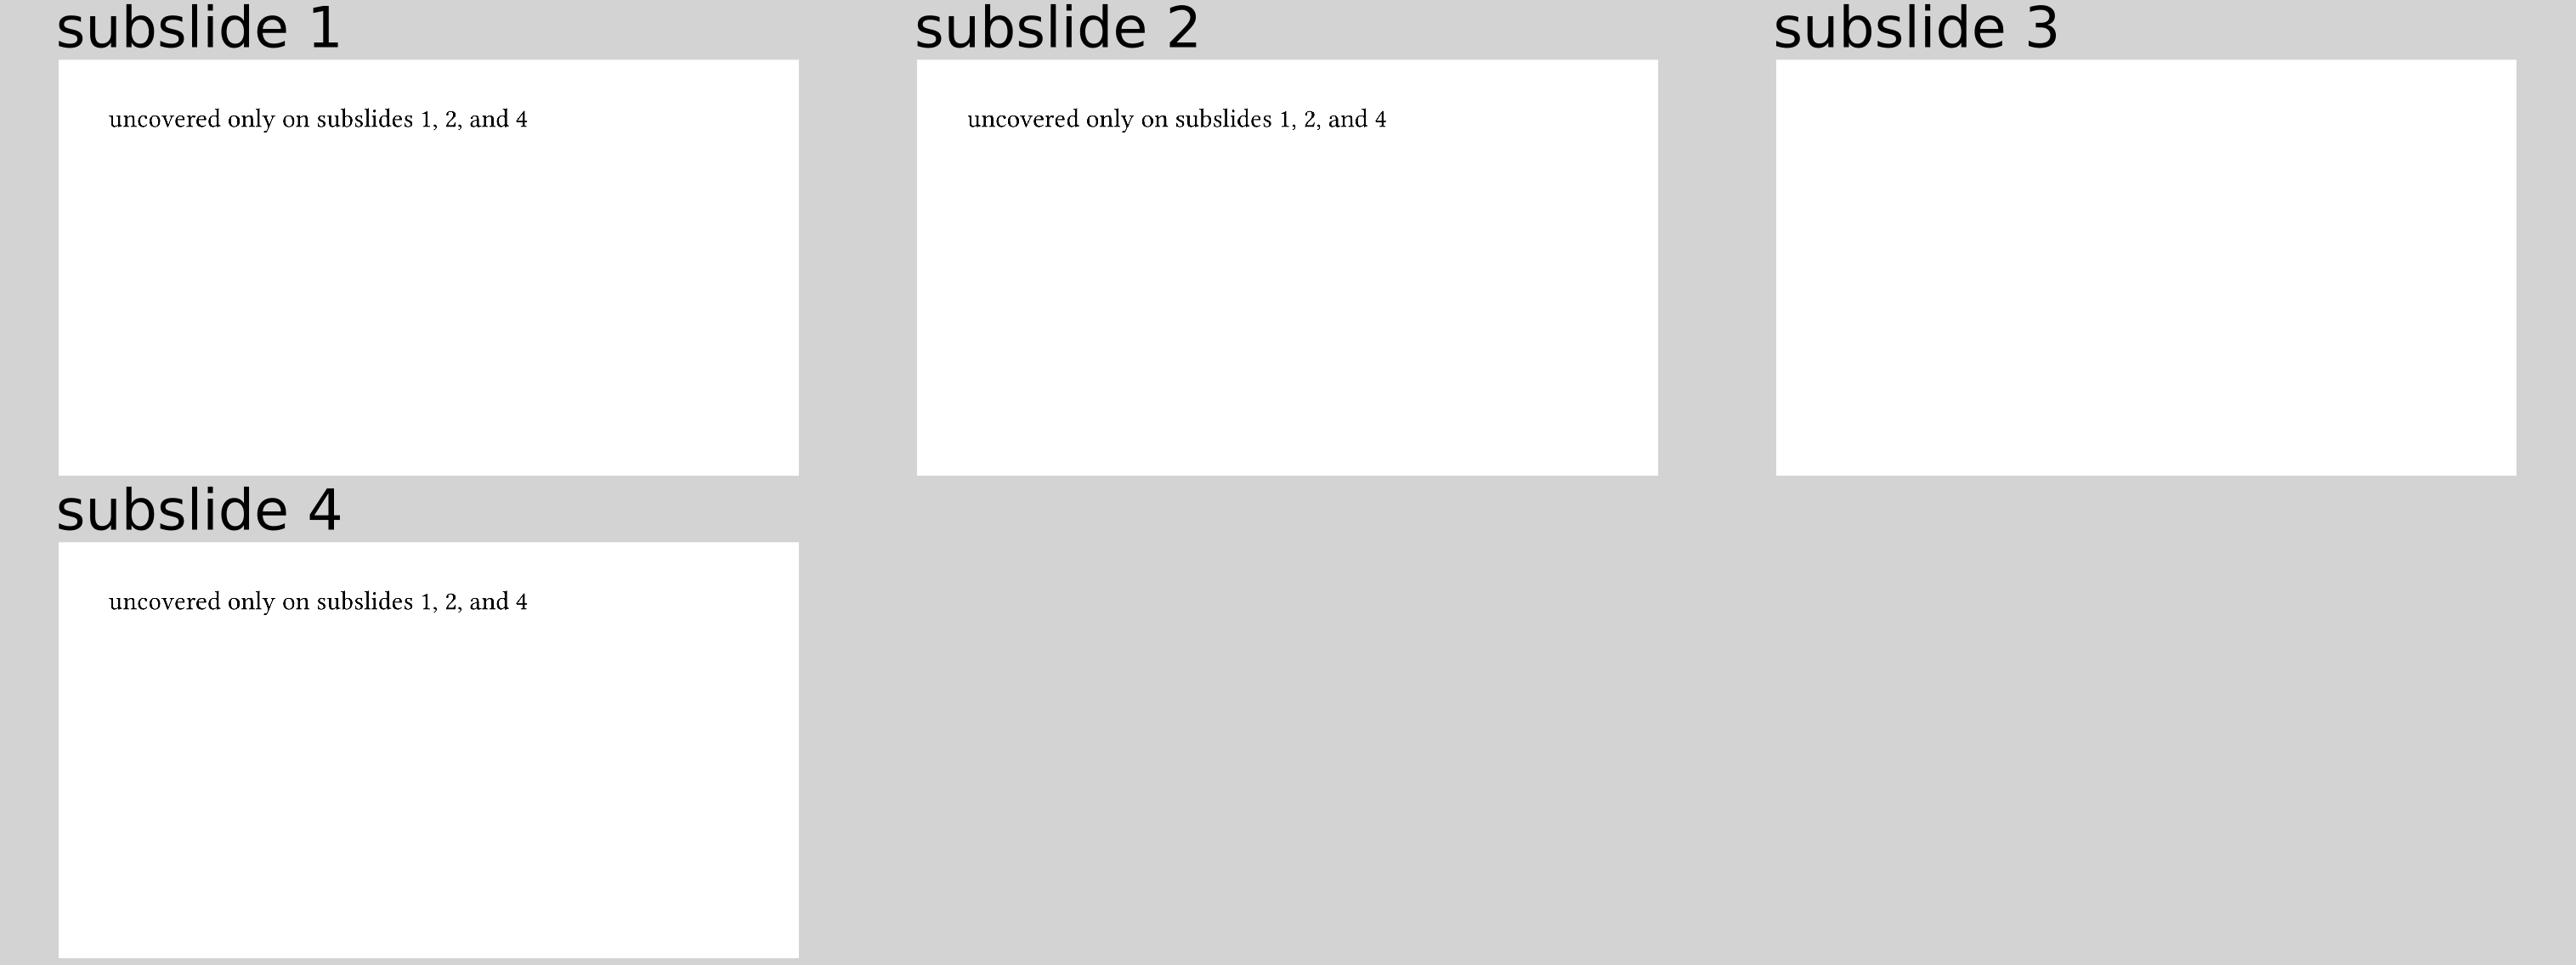
The array elements can actually themselves be any kind of rule that is explained on this page.
Interval
You can also provide a (bounded or half-bounded) interval in the form of a
dictionary with a beginning and/or an until key:
#slide[
  #only((beginning: 1, until: 5))[Content displayed on subslides 1, 2, 3, 4, and 5 \ ]
  #only((beginning: 2))[Content displayed on subslide 2 and every following one \ ]
  #only((until: 3))[Content displayed on subslides 1, 2, and 3 \ ]
  #only((:))[Content that is always displayed]
]
results in:
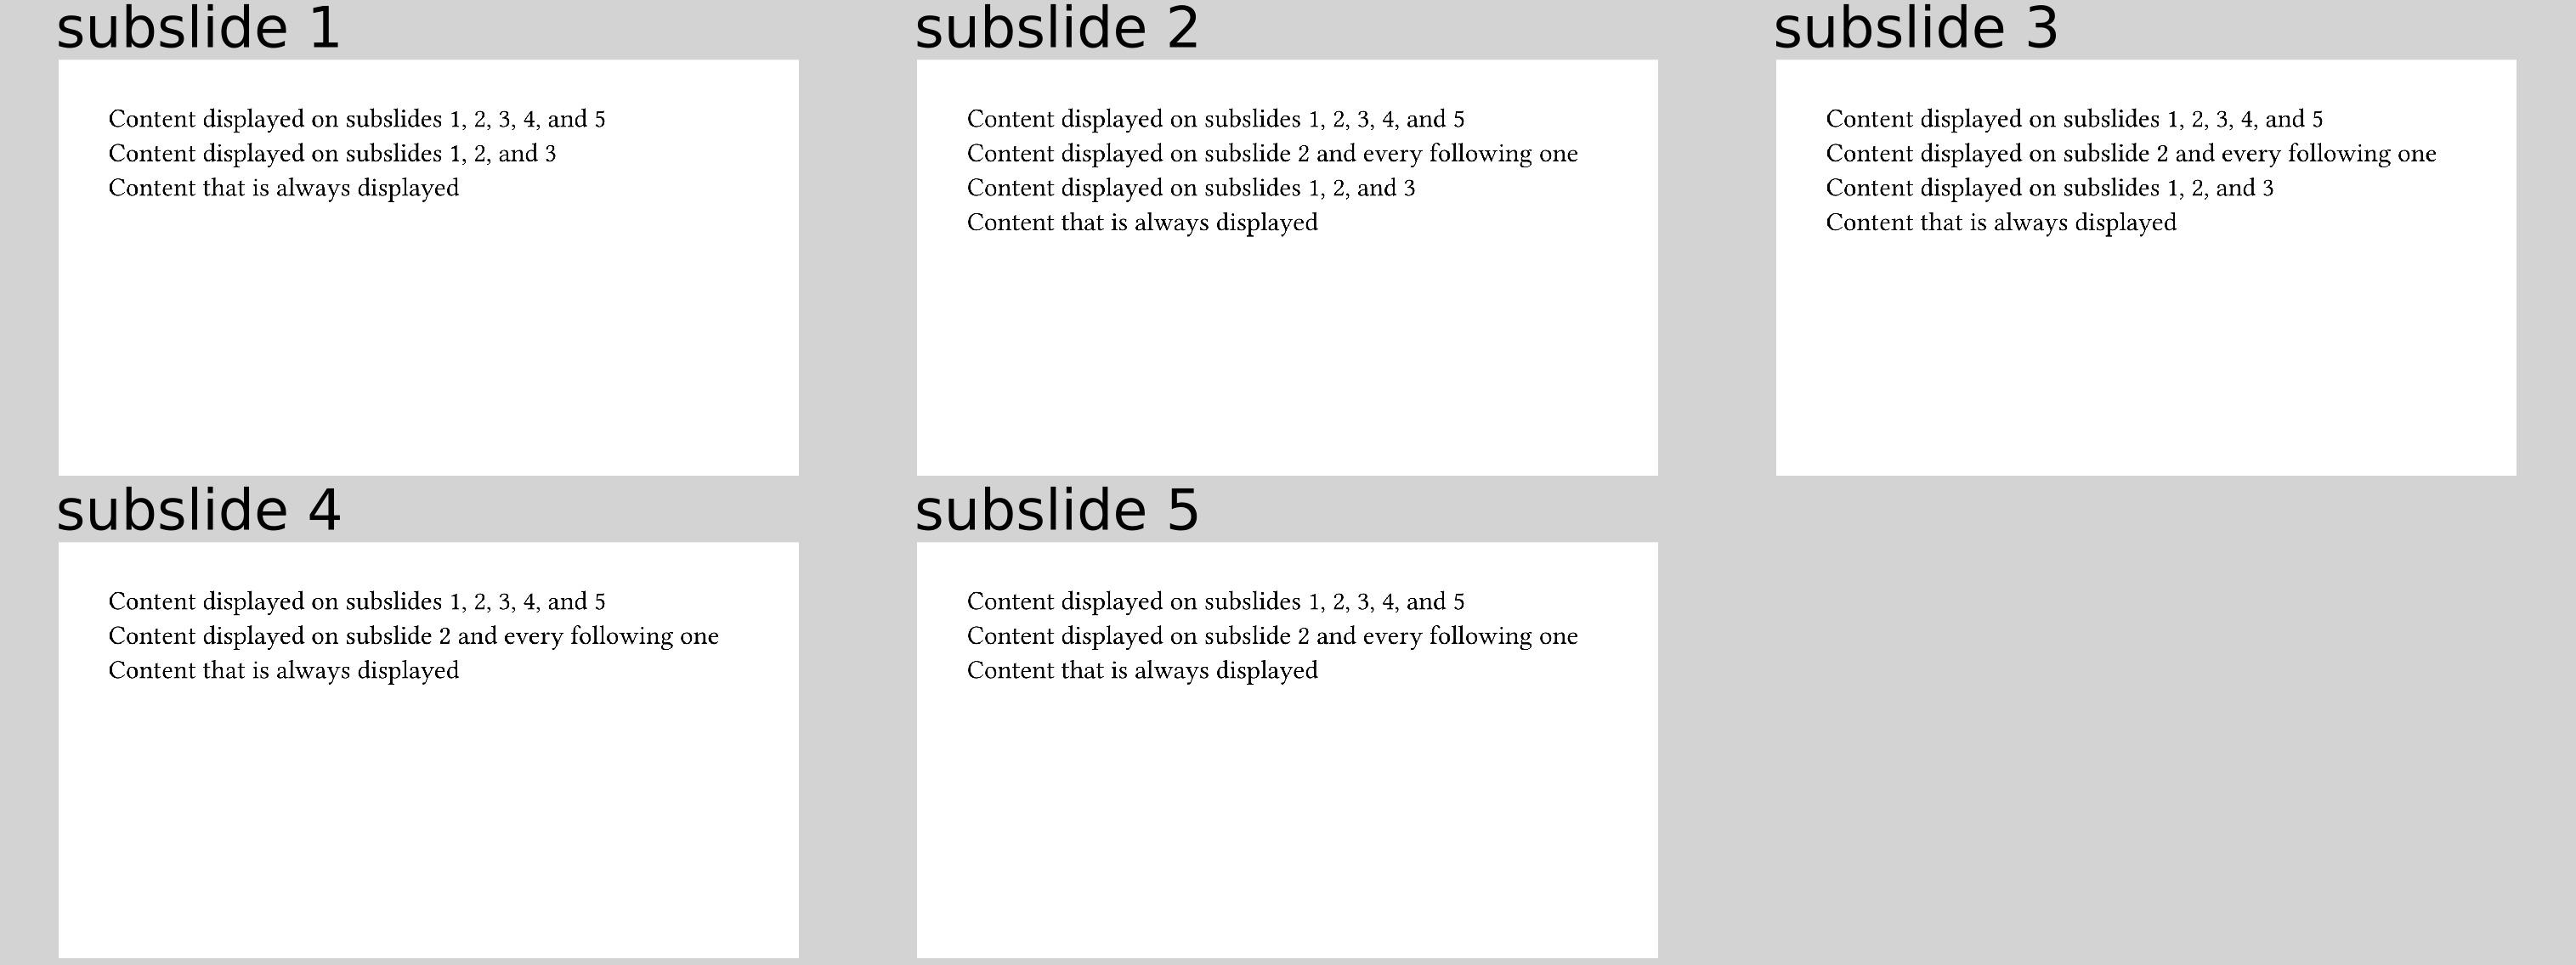
In the last case, you would not need to use #only anyways, obviously.
Convenient syntax as strings
In principle, you can specify every rule using numbers, arrays, and intervals. However, consider having to write
#uncover(((until: 2), 4, (beginning: 6, until: 8), (beginning: 10)))[polylux]
That's only fun the first time. Therefore, we provide a convenient alternative. You can equivalently write:
#uncover("-2, 4, 6-8, 10-")[Polylux]
which results in:
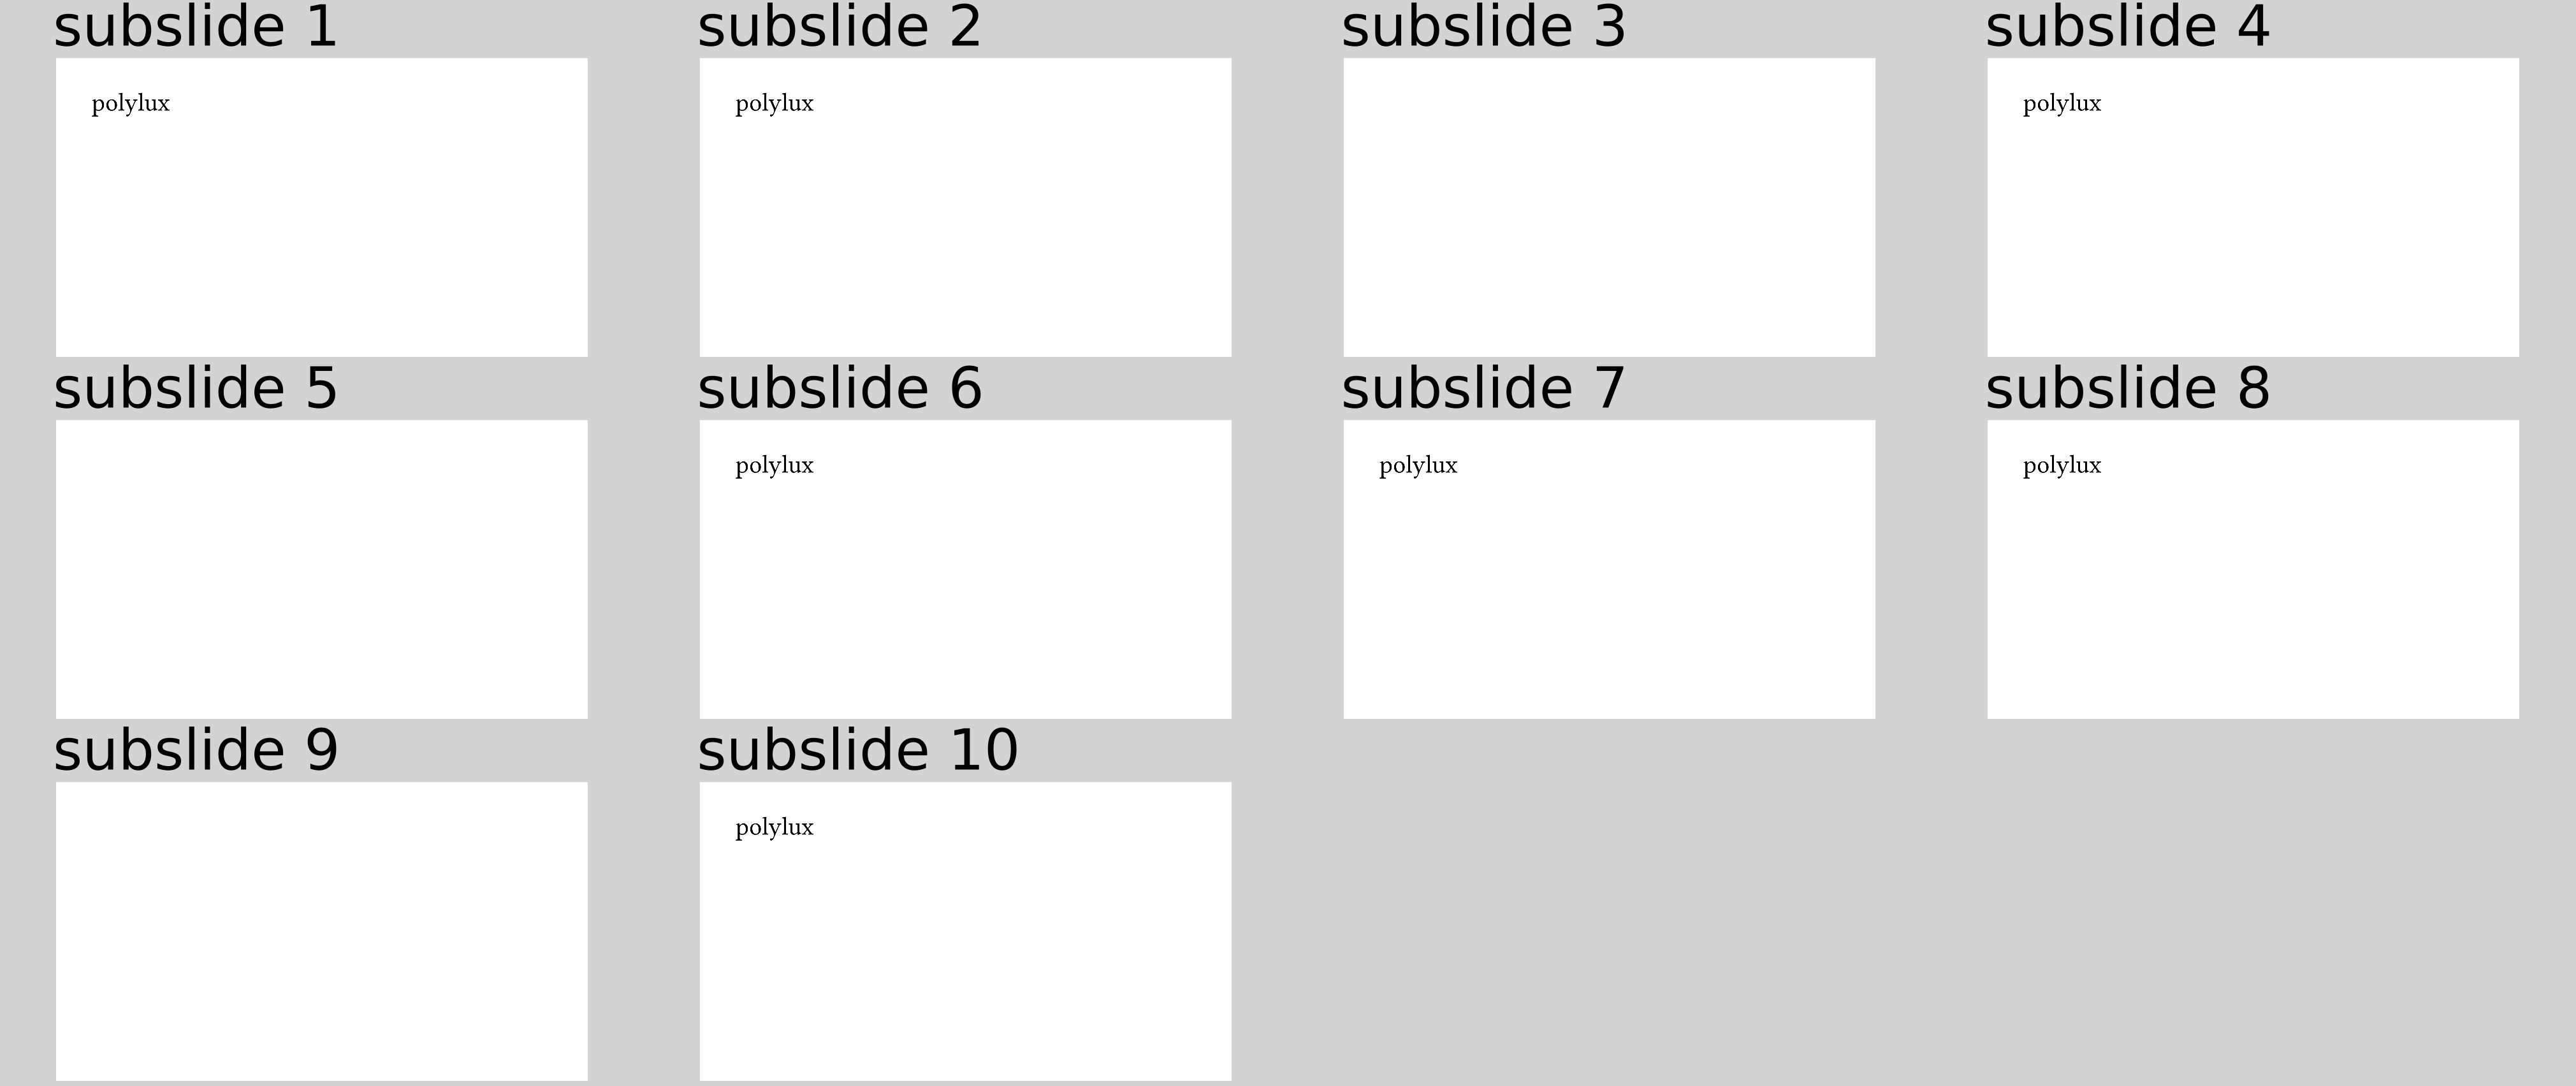
Much better, right? The spaces are optional, so just use them if you find it more readable.
Unless you are creating those function calls programmaticly, it is a good
recommendation to use the single-number syntax (#only(1)[...]) if that
suffices and the string syntax for any more complex use case.
Higher level helper functions
With #only and #uncover you can come a long way but there are some reoccurring
situations for which helper functions are provided.
We call them "higher level" because they use #only and #uncover under the
hood and operate on larger pieces of content.
For the common case of succesively revealing content, there are #pause and
#one-by-one and its friends.
For substituting content, we have #alternatives in different variants.
The following sections will describe these functions in detail.
show: later to reveal content piece by piece
Consider some code like the following:
#uncover("1-")[first]
#uncover("2-")[second]
#uncover("3-")[third]
The goal here is to uncover parts of the slide one by one, so that an increasing amount of content is shown, but we don't want to specify all subslide indices manually, ideally.
If you have used the LaTeX beamer package before, you might be familiar with the
\pause command.
It makes everything after it on that slide appear on the next subslide.
Features of the kind "everything after this" are handled in Typst using the
#show: feature.
Namely, #show: some-function uses the following content as an argument to
some-function.
Polylux provides the later function that makes its argument appear on the
next subslide.
So, we can equivalently write the above code as:
first
#show: later
second
#show: later
third
This results in

#show: later should mainly be used when you want to distribute a lot of code
onto different subslides.
For smaller pieces of code, consider one of the functions described next.
Multiple scopes
Note that, like every show-rule, #show: later only affects the rest of its
surrounding scope.
For other (potentially conceptually later) content in a different scope, you
have to use a new #show: later rule.
If you see weird interactions between different scopes using #show: later
or you get a warning from Typst that layouting did not converge, you can make
use of the optional argument strand (set to 1 by default):
#[
  this is scope 1
  #show: later
  still scope 1
]
#[
  this is scope 2
  #show: later.with(strand: 2)
  still scope 2
]
Every strand works independently of every other.
More sophisticated piecewise revealing
#one-by-one
#pause may be considered syntactically a bit cumbersome as it employs a
show-rule.
If you prefer to signal the grouping of content appearing together by using
a single function call, you can use #one-by-one:
#one-by-one[Do you know ][$pi$ ][to a thousand decimal places?]
resulting in

If we still want to uncover certain elements one after the other but starting
on a later subslide, we can use the optional start argument of #one-by-one:
#one-by-one(start: 3)[This ][came ][pretty late.]
resulting in
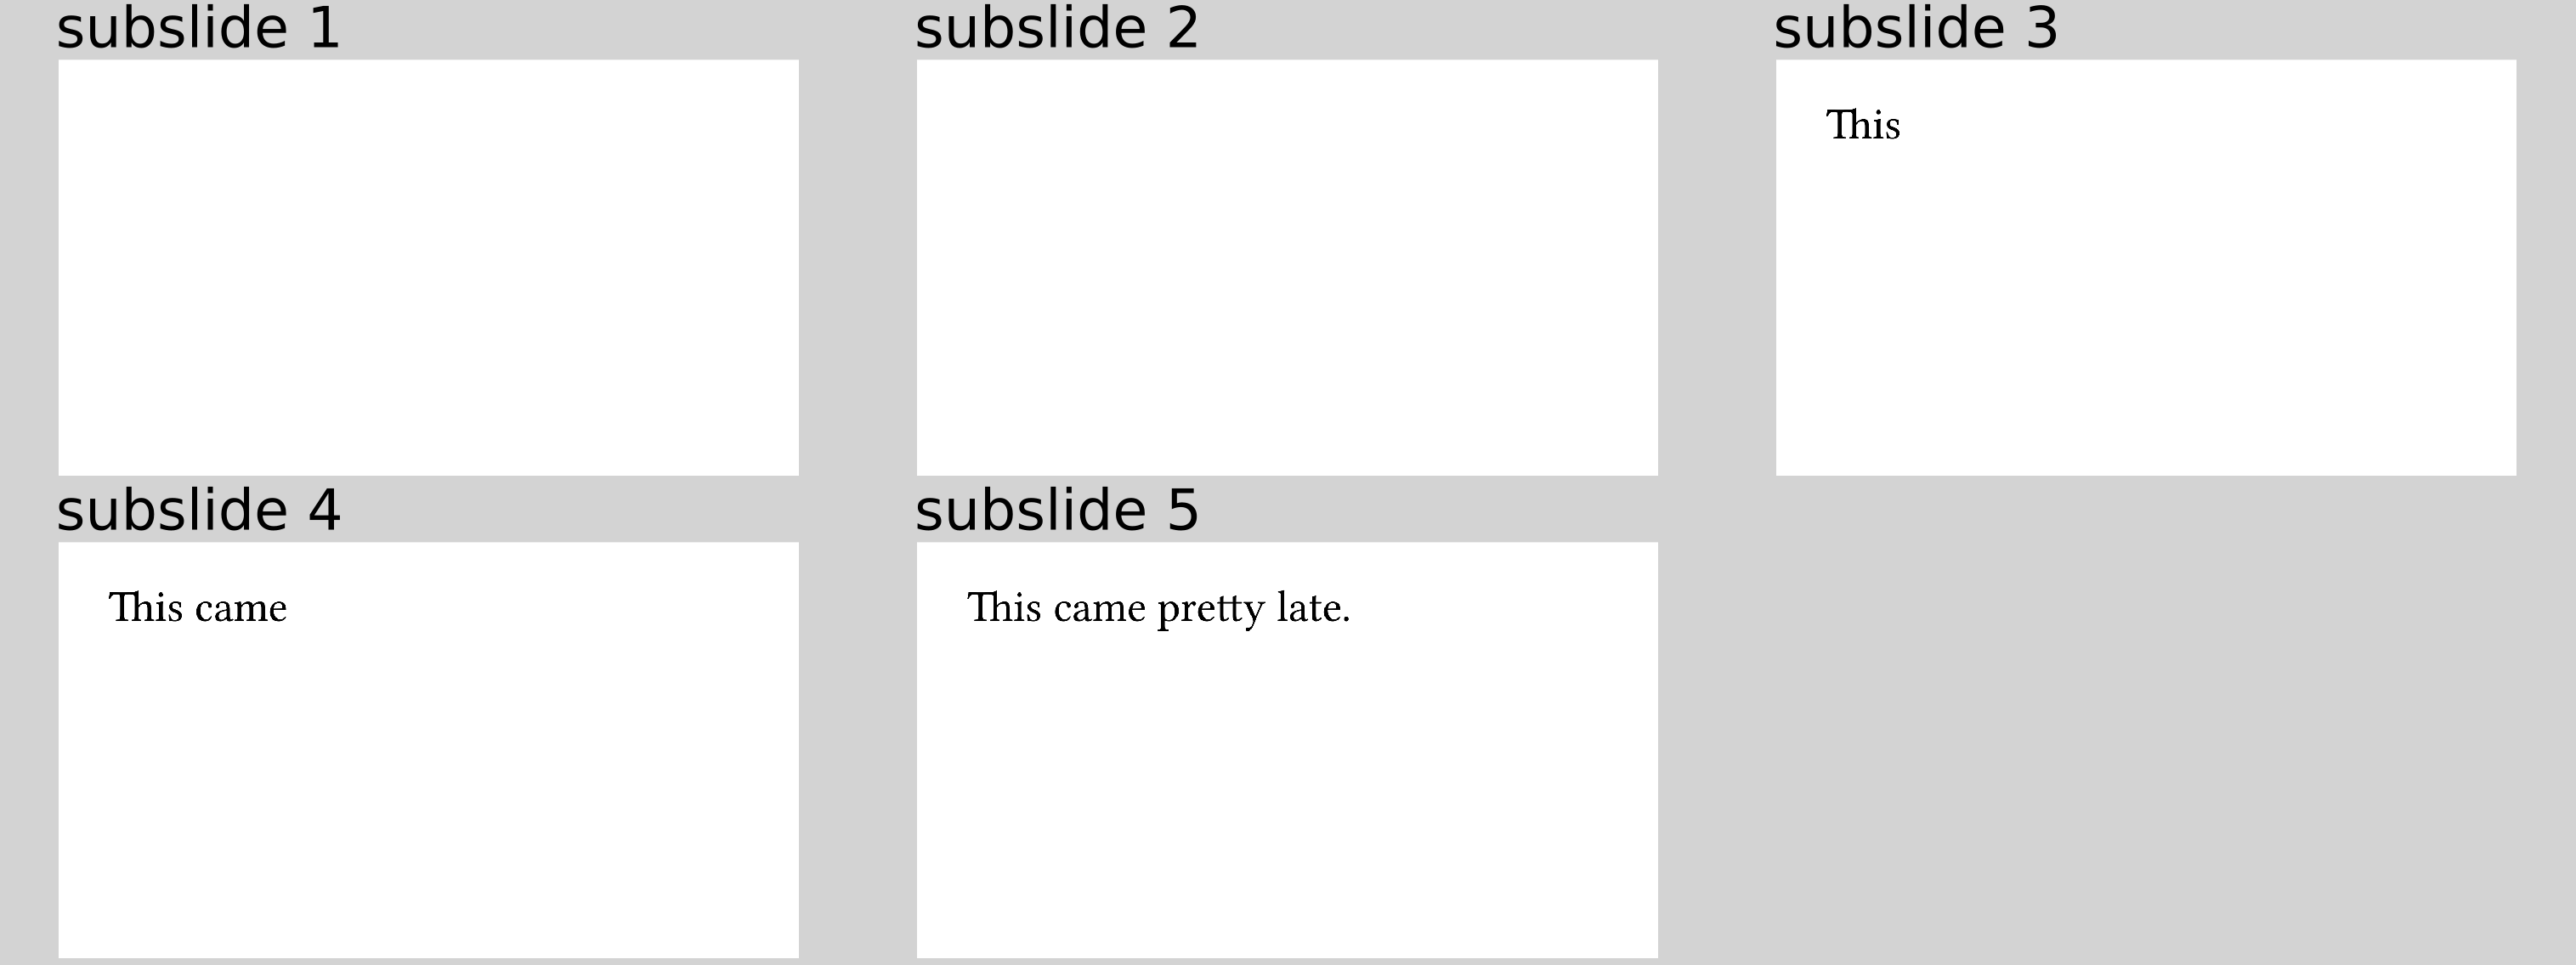
This optional start argument exists for all functions displayed on this page.
#item-by-item
#one-by-one is especially useful for arbitrary contents that you want to display
in that manner.
Sometimes, it produces a bit too much syntactical noise with all the brackets
between content, though.
That is especially true for lists, enums, and term lists.
Instead of
#one-by-one[
  - first
][
  - second
][
  - third
]
you can also write
#item-by-item[
  - first
  - second
  - third
]
resulting in

A more complex example involving enums and term lists:
#show: columns.with(3)

#set list(marker: sym.arrow)
#item-by-item[
  - first
  - second
    - some
    - detail
  - third
]
#colbreak()

#item-by-item[
  + also
  + works
  + with `enums`
]
#colbreak()

#item-by-item(start: 2)[
  / and: with
  / terms: too
]

Note that the list markers and enum numbers are not hidden. You can truly consider this a bug or a feature...
#alternatives to substitute content
The so far discussed helpers #later, #one-by-one etc. all build upon
#uncover.
There is an analogon to #one-by-one that is based on #only, namely
#alternatives.
You can use it to show some content on one subslide, then substitute it by
something else, then by something else, etc.
Consider this example:
#only(1)[Ann] #only(2)[Bob] #only(3)[Christopher]
likes
#only(1)[chocolate] #only(2)[strawberry] #only(3)[vanilla]
ice cream.

#repeat[| #h(4cm)] // visual reference
Here, we want to display three different sentences with the same structure: Some person likes some sort of ice cream.

As you can see, the positioning of likes and ice cream moves
around in the produced slide because, for example, Ann takes much less space
than Christopher when using #only for that job.
This somewhat disturbs the perception of the constant structure of the sentence
and that only the names and kinds of ice cream change.
To avoid such movement and only substitute certain parts of content, you can use
the #alternatives function.
With it, our example becomes:
#alternatives[Ann][Bob][Christopher]
likes
#alternatives[chocolate][strawberry][vanilla]
ice cream.

#repeat[| #h(4cm)] // visual reference
resulting in

#alternatives will put enough empty space around, for example, Ann such that
it uses the same amount of space as Christopher.
In a sense, it is like a mix of #only and #uncover with some reserving of
space.
Repeat last content
In case you have other dynamic content on a slide that happens after the contents
of #alternatives are exhausted, you might want to not have the #alternatives
element disappear but instead continue to show its last content argument.
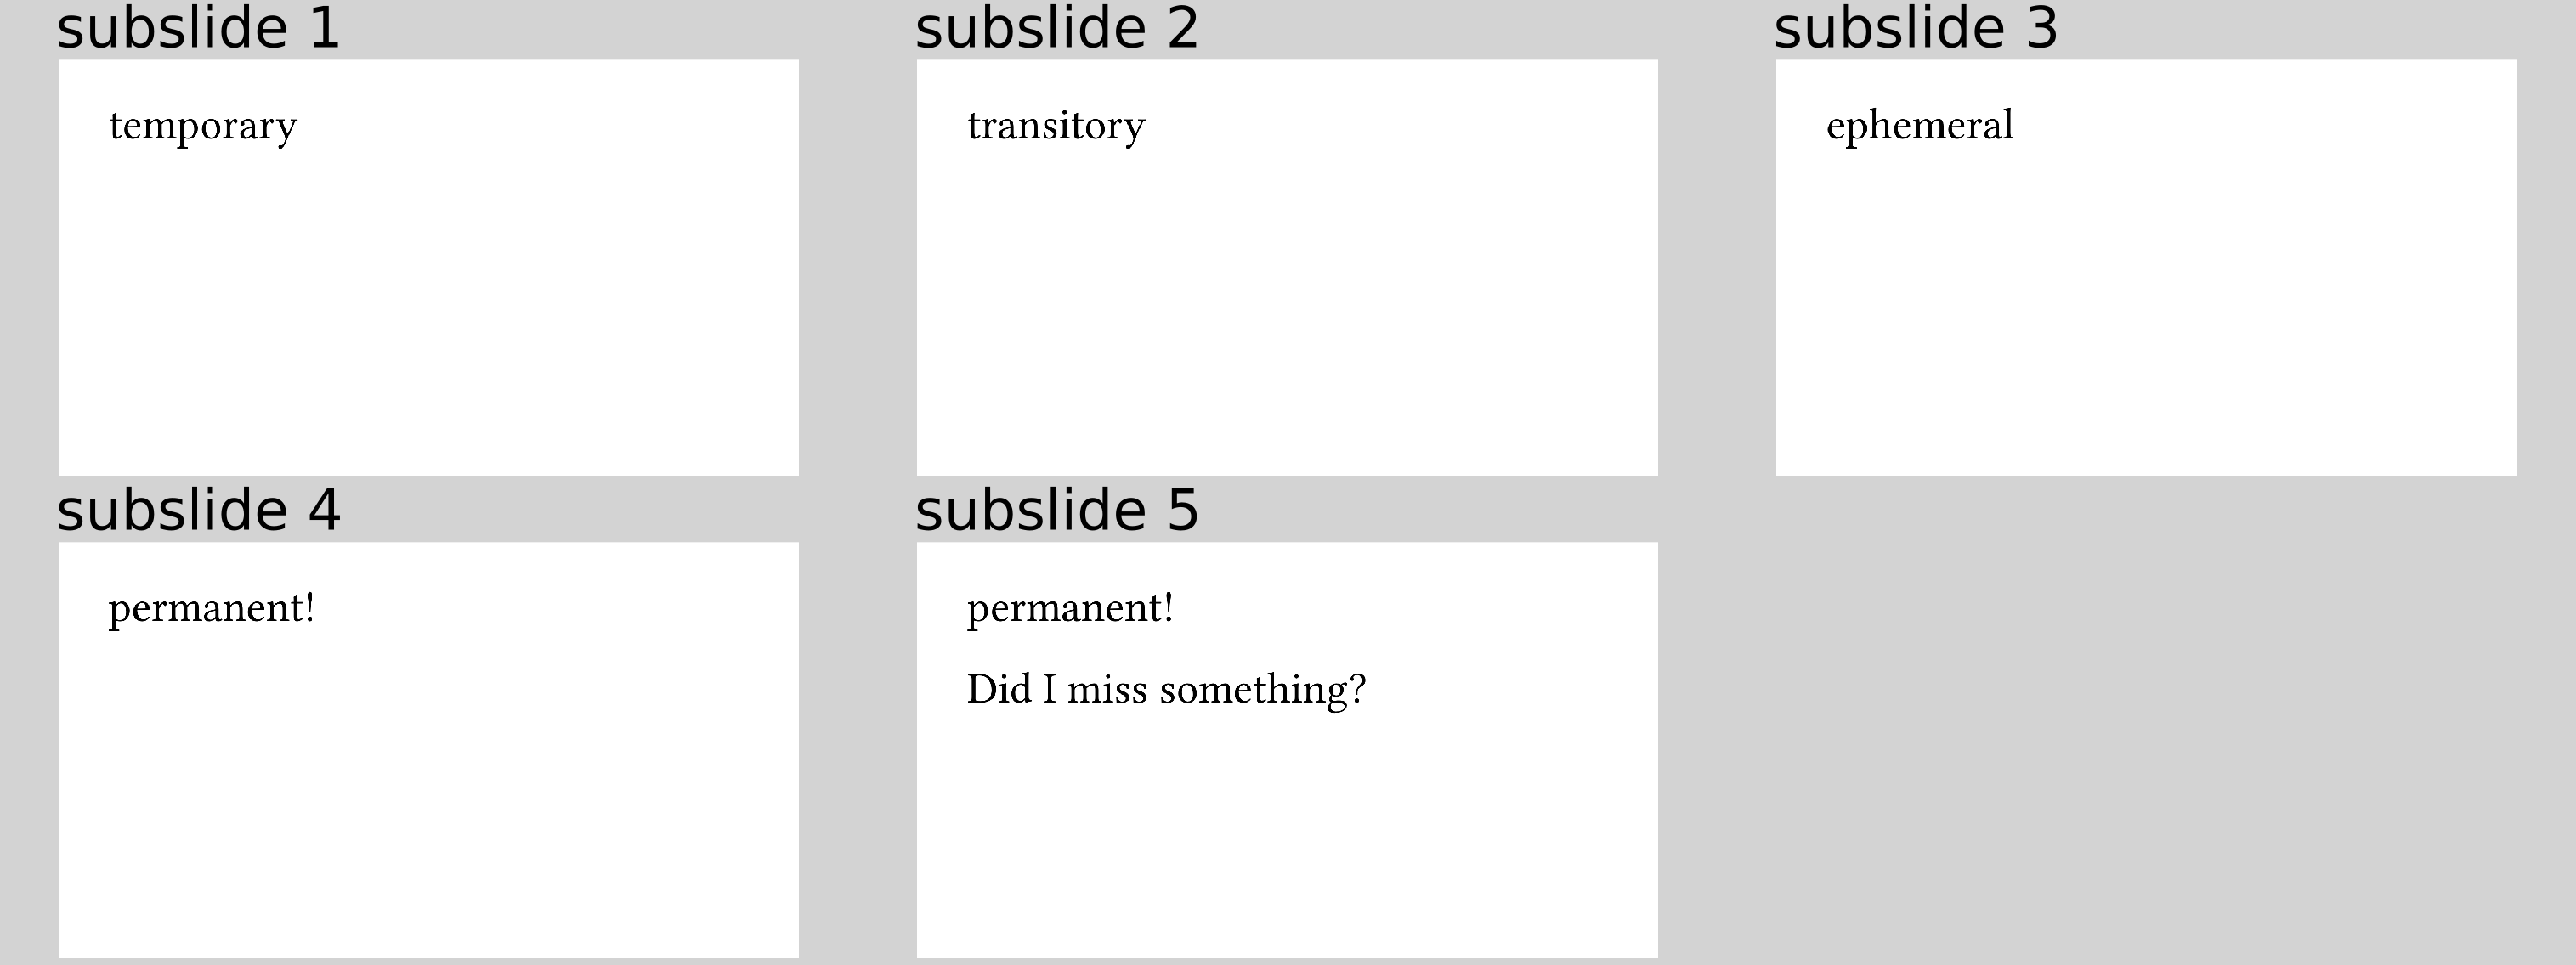
To achieve this, you can use the repeat-last parameter:
#alternatives(repeat-last: true)[temporary][transitory][ephemeral][permanent!]

#uncover(5)[Did I miss something?]
resulting in
Positioning
By default, all elements that enter an #alternatives command are aligned at
the bottom left corner.
This might not always be the desired or the most pleasant way to position it, so
you can provide an optional position argument to #alternatives that takes an
alignment or 2d alignment.
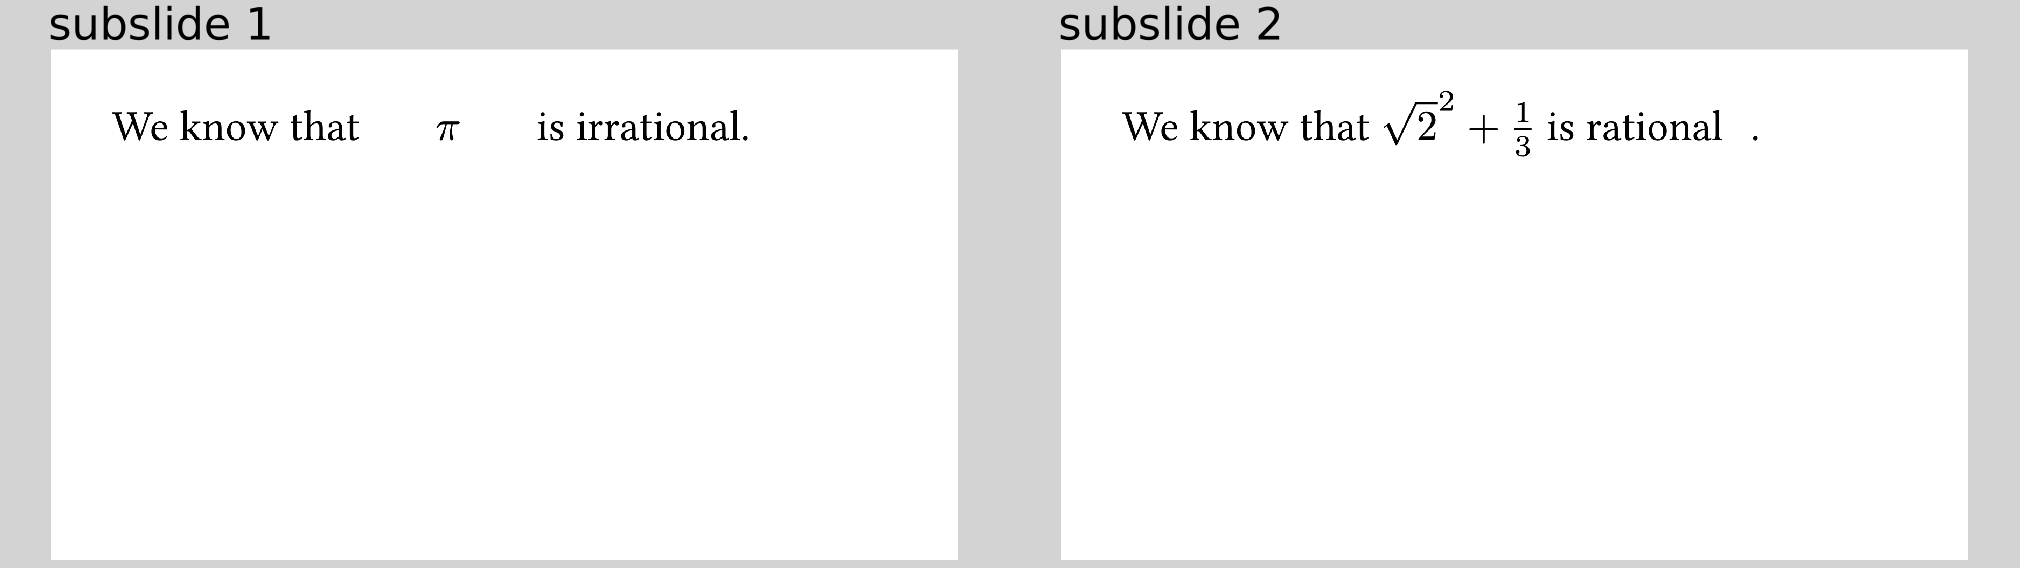
For example:
We know that
#alternatives(position: center + horizon)[$pi$][$sqrt(2)^2 + 1/3$]
is
#alternatives[irrational][rational].
makes the mathematical terms look better positioned:
All functions described on this page have such a position argument.
Similar to #one-by-one, #alternatives also has an optional start argument
that works just the same.
#alternatives-match
#alternatives has a couple of "cousins" that might be more convenient in some
situations.
The first one is #alternatives-match that has a name inspired by match-statements
in many functional programming languages.
The idea is that you give it a dictionary mapping from subslides to content:
#alternatives-match((
  "1, 3-5": [this text has the majority],
  "2, 6": [this is shown less often]
))
resulting in
Note that it is your responsibility to make sure that the subslide sets are mutually disjoint.
#alternatives-cases
You can use this function if you want to have one piece of content that changes only slightly depending of what "case" of subslides you are in. So instead of
#alternatives-match((
  "1, 3" : [
    Some text
  ],
  "2" : [
    #set text(fill: teal)
    Some text
  ],
))
you can avoid duplication and write
#alternatives-cases(("1, 3", "2"), case => [
  #set text(fill: teal) if case == 1
  Some text
])
using a function that maps the current "case" to content, resulting in

Note that the cases are 0-indexed (as are Typst arrays).
#alternatives-fn
Finally, you can have very fine-grained control over the content depending on
the current subslide by using #alternatives-fn.
It accepts a function (hence the name) that maps the current subslide index to
some content.
Similar to #alternatives, it accepts an optional start parameter that has a
default of 1.
#alternatives-fn only knows for how long to display something, though, if you
provide either the number of subslides (count parameter) or the last subslide
index (end parameter).
So exactly one of them is necessary.
For example:
We are on subslide:
#alternatives-fn(start: 2, count: 7, subslide => {
  numbering("(i)", subslide)
})
resulting in
Succesively uncover code
Since Typst has great builtin support for typesetting code, Polylux wants to
provide a convenience feature for this as well.
Namely, the function #reveal-code takes a code block and splits it into
parts shown on different subslides.
As an example:
#reveal-code(lines: (1, 3, 6, 7))[```rust
  pub fn main() {
    let x = vec![3, 4, 1];
    let y = &x;
    if let Some(a) = x.first() {
      dbg!(a);
    } else {
      println!("x is empty.");
    }
  }
```]
As we can see, the code is revealed up to the first, third, sixth, and then seventh row on each new subslide. Every line that has already been previously revealed is shown in gray. Afterwards, the whole code is shown without alterations.
Configuration
You can configure a couple of things about reveal-code:
Show the whole code in the end
As demonstrated above, this is the default behaviour.
If you don't want that, use the option full: false like so:
#reveal-code(lines: (2, 4), full: false)[```
  first line
  second line
  third line
  fourth line
  fifth line
```]
What to do with previous and future lines
By default, previously uncovered lines are shown in gray and not yet uncovered
lines are hidden.
This can be controlled using the before and after options.
Like the cover mode for other functions, these accept either
hide or any color.
The default is thus before: gray and after: hide.
First subslide
Similar to here, there is also a start option to specify the
first subslide where code is revealed.
Cover mode
Covered content (using #uncover, #one-by-one, #item-by-item, or
#show: later) is completely invisible, by default.
You can decide to make it visible but less prominent using the optional mode
argument to each of those functions.
The mode argument takes two kinds of values: hide (the default) or any
color.
When using a color as the mode, text is printed in that color.
Use it as follows:
#uncover(3, mode: gray)[abc]

#one-by-one(start: 2, mode: gray)[def ][ghi]

#item-by-item(mode: gray)[
  - jkl
  - mno
]

#show: later.with(mode: gray)
pqr
resulting in

Warning! The "color mode" really only wraps the covered content in a
#text(fill: mode)[...]
so it has only limited control over the actual display. Especially
- text that defines its own color (e.g. syntax highlighting),
- visualisations,
- images
will not be affected by that. This makes the color mode only somewhat useful today. (Relevant GitHub issue)
Handout mode
If you distribute your slides after your talk for further reference, you might
not want to keep in all the dynamic content.
Imagine using item-by-item on a long list and readers having to scroll through
endless pages when they just want to see the full list.
You can use #enable-handout-mode(true) at the top of your code to achieve
this:
It has the effect that all dynamic visibility of elements that reserve space is switched off. For example,
#enable-handout-mode(true)
// ...
#slide[
  Some text.
  #uncover("3-")[You cannot always see this.]
  Or can you?
  #show: later

  And what about this?
]
becomes:
Note that only and alternatives are not affected as there is no obvious
way to unify their content to one slide.
Toolbox
Polylux exports a module called toolbox that provides some common building
blocks for designing your slides.
Side by side
To make good use of the space on a slide, you will often want to place content
next to each other.
For convenience, toolbox provides the function #side-by-side for this
purpose.
It is basically a thin wrapper around the Typst function
#grid but tailored
towards this specific usecase.
In its simplest form, you can use it as
#toolbox.side-by-side[
  #lorem(7)
][
  #lorem(10)
][
  #lorem(5)
]
As you can see, the content arguments you provide will be placed next to each
other with equal proportions of width.
A spacing (gutter) of 1em will also be put between them.
The widths and gutter can be configured using the columns and gutter
optional arguments, respectively.
They are propagated to #grid directly so you can look up possible values in
its documentation
(gutter
and
columns
arguments).
If not specified, they fall back to these defaults:
gutter:1emcolumns:(1fr,) * nif you providedncontent arguments, that means an array with the value1frrepeatedntimes.
A more complex example would therefore be:
#toolbox.side-by-side(gutter: 3mm, columns: (1fr, 2fr, 1fr))[
  #rect(width: 100%, stroke: none, fill: aqua)
][
  #rect(width: 100%, stroke: none, fill: teal)
][
  #rect(width: 100%, stroke: none, fill: eastern)
]
How much longer? 🥱
There are a handful of features that let you display the progress of the presentation.
The most simple one is directly displaying the current slide number.
Remember that each slide might produce an arbitrary amount of subslides, i.e.
PDF pages, so we cannot rely on the builtin page counter.
Instead, there is #toolbox.slide-number to see what the current slide number
is.
If you want to put that into relation to how many slides there are in total,
you can also display #toolbox.last-slide-number.
Note that both these things are content, though, so you can only display them
and not calculate with the numbers.
A common calculation you might want do to is finding their ratio, i.e. current
slide number divided by total number of slides.
To that end, you can use the function toolbox.progress.
You can pass a function to it that turns the current ratio into some content.
You might utilise this to display a little progress bar, for example:
#let my-progress = {
  [#toolbox.slide-number / #toolbox.last-slide-number]

  toolbox.progress-ratio(ratio => {
    stack(
      dir: ltr,
      rect(stroke: blue, fill: blue, width: ratio       * 8cm),
      rect(stroke: blue, fill: none, width: (1 - ratio) * 8cm),
    )
  })
}

#set align(horizon)

#for _ in range(6) {
  slide[
    #my-progress
  ]
}
Sections
Another way of expressing where we are in a presentation is working with sections.
In your presentation, you can incorporate the following features from the
toolbox module:
First, whenever you want to start a new section, you can call
#toolbox.register-section(the-section-name)
with whatever name you want.
Based on that, you can then display what section the presenter is currently in by using:
#toolbox.current-section
If no section has been registered so far, this is empty content ([]).
And finally, you might want to display some kind of overview over all the sections. This is achieved by:
#toolbox.all-sections((sections, current) => [some content])
all-sections takes a function with two arguments and uses that to produce
some content based on all sections in the presentation and the current one.
For example:
#let sections-band = toolbox.all-sections( (sections, current) => {
  set text(fill: gray, size: .8em)
  sections
    .map(s => if s == current { strong(s) } else { s })
    .join([ • ])
})

#set page(footer: sections-band)

#slide[
  #toolbox.register-section[The beginning]

  #lorem(5)
]

#slide[
  #lorem(3)
]


#slide[
  #toolbox.register-section[The middle]

  #lorem(6)
]

#slide[
  #toolbox.register-section[The end]

  #lorem(4)
]
Another example, producing a table of contents and title slides for each new section:
#let my-new-section(name) = slide[
  #set align(horizon)
  #set text(size: 2em)
  #toolbox.register-section(name)

  #strong(name)
]

#slide[
  #toolbox.all-sections((sections, current) => {
    enum(..sections)
  })
]

#my-new-section[The beginning]

#slide[
  We are currently in Section "#toolbox.current-section" and I like it so far.
]

#slide[
  Still in the same section.
]

#my-new-section[The middle]

#slide[
  Oh, new section. What comes after "#toolbox.current-section"?
]

#my-new-section[The end]

#slide[
  You might have guessed this, to be honest.
]
Find next heading
It can be very convenient to specify something like slide titles using headings as they have a dedicated Typst syntax. While it might suffice to just style how a heading is displayed using a show rule, this is not feasible when the slide title is supposed to be part of the page header, for example.
For these situations, the toolbox provides #toolbox.next-heading.
It takes a function mapping the body of the first heading on the same page (if
it exists) to some content.
The intended use is as such:
#set page(
  paper: "presentation-16-9",
  header: toolbox.next-heading(h => underline(h))
)

#show heading.where(level: 1): none

#set align(horizon)

#slide[
  = My slide title

  #lorem(10)
]

#slide[
  slide without a title
]

#slide[
  = Another title

  #lorem(10)
]

Note the extra show rule for level-one headings making them invisible.
You can make #toolbox.next-heading look for headings of other levels as well,
just specify the optional level argument that defaults to 1.
Scaling big
Use the function #toolbox.big to scale some content such that it fills the
available width and height on a slide.
In particular, it will fill the height 1fr.
Keep this in mind when using other elements of fractional height, such as
v(1fr).
#toolbox.big[BIG]

How well this works depends on the content you want to scale. Note that the scaling is not proportional so the content might get distorted. Insert linebreaks to adjust how the result looks.
In this more complex example, we have the same text scaled by big three times
but we succesively adjust it using linebreaks and the leading height.
#slide[
  #toolbox.big[
    Lorem ipsum dolor sit amet, consectetur adipiscing elit, sed do eiusmod
    tempor incididunt ut labore et dolore magnam aliquam quaerat.
  ]
]

#slide[
  #toolbox.big[
    Lorem ipsum dolor sit amet, consectetur \ adipiscing elit, sed do eiusmod \
    tempor incididunt ut labore et dolore \ magnam aliquam quaerat.
  ]
]

#slide[
  #set par(leading: .1em)
  #toolbox.big[
    Lorem ipsum dolor sit amet, consectetur \ adipiscing elit, sed do eiusmod \
    tempor incididunt ut labore et dolore \ magnam aliquam quaerat.
  ]
]

Full width block
Sometimes you want content that spans the whole physical width of your slide,
disregarding the page margin.
This can be achieved using some annoying calculatings involving page.margin
which are luckily already done for you if you use #toolbox.full-width-block!
Note that this only works when the left and right page margin are explicitly
specified (i.e. both are neither none nor auto).
This can be very useful for headers and footers.
#set page(
  paper: "presentation-16-9",
  margin: 2cm,
  header: align(top,    toolbox.full-width-block(fill: aqua, inset: 8pt)[I'm up high]),
  footer: align(bottom, toolbox.full-width-block(fill: lime, inset: 8pt)[I'm down low]),
)

#slide[
  #lorem(10)
]
External tools
Most users will only come across Typst itself and some off-the-shelf PDF viewer. However, there are some additional tools that might come in handy and Polylux supports some of their special needs.
So far, this support is limited to the pdfpc presentation tool.
pdfpc
pdfpc is a "presenter console with multi-monitor support for PDF-files". That means, you can use it to display slides in the form of PDF-pages and also have some of the nice features known from, for example, PowerPoint. Check out their website to learn more.
When pdfpc is provided a special .pdfpc file containing some JSON data, it can
use that to enhance the user experience by correctly handling overlay slides,
displaying speaker notes, setting up a specific timer, and more.
While you can write this file by hand or use the pdfpc-internal features to edit
it, some might find it more convenient to have all data about their presentation
in one place, i.e. the Typst source file.
Polylux allows you to do that.
Adding metadata to the Typst source
Polylux exports the pdfpc module that comes with a bunch of useful functions
that do not actually add any content to the produced PDF but instead insert
metadata that can later be extracted from the document.
Speaker notes
This is possibly the most useful feature of pdfpc.
Using the function #pdfpc.speaker-note inside a slide, you can add a note to
that slide that will only be visible to the speaker in pdfpc.
It accepts either a string:
#pdfpc.speaker-note("This is a note that only the speaker will see.")
or a raw block:
#pdfpc.speaker-note(
  ```md
  # My notes
  Did you know that pdfpc supports Markdown notes? _So cool!_
  ```
)
Note that you can only specify one note per slide (only the first one will survive if you use more than one.)
End slide
Sometimes the last slide in your presentation is not really the one you want to end with. Say, you have some bibliography or appendix for the sake of completeness after your "I thank my mom and everyone who believed in me"-slide.
With a simple pdfpc.end-slide inside any slide you can tell pdfpc that this is
the last slide you usually want to show and hitting the End key will jump there.
Save a slide
Similarly, there is a feature in pdfpc to bookmark a specific slide (and you can
jump to it using Shift + M).
In your Typst source, you can choose that slide by putting pdfpc.save-slide
inside it.
Hide slides
If you want to keep a certain slide in your presentation (just in case) but don't
normally intend to show it, you can hide it inside pdfpc.
It will be skipped during the presentation but it is still available in the
overview.
You can use pdfpc.hidden-slide in your Typst source to mark a slide as hidden.
Configure pdfpc
The previous commands are all supposed to be used inside a slide.
To perform some additional global configuration, you can use pdfpc.config()
before any of the slides (it will not be recognised otherwise).
It accepts the following optional keyword arguments:
-
duration-minutes: how many minutes (a number) the presentation is supposed to take, affects the timer in pdfpc -
start-time: wall-clock time when the presentation is supposed to start, either as adatetime(hour: ..., minute: ..., second: ...)or as a string in theHH:MMformat -
end-time: same asstart-timebut when the presentation is supposed to end -
last-minutes: how many minutes (a number) before the time runs out the timer is supposed to change its colour as a warning -
note-font-size: the font size (a number) the speaker notes are displayed in -
disable-markdown: whether or not to disable rendering the notes as markdown (a bool), defaultfalse -
default-transition: the transition to use between subsequent slides, must be given as a dictionary with (potentially) the following keys:type: one of"replace"(default),"push","blinds","box","cover","dissolve","fade","glitter","split","uncover","wipe"duration-seconds: the duration of the transition in seconds (a number)angle: in which angle the transition moves, one ofltr,rtl,ttb, andbtt(see the#stackfunction)alignment: whether the transition is performed horizontally or vertically, one of"horizontal"and"vertical"direction: whether the transition is performed inward or outward, one of"inward"and"outward"
Not all combinations of values are necessary or make sense for all transitions, of course.
Extracting the data: polylux2pdfpc
As mentioned above, the functions from the pdfpc module don't alter the produced
PDF itself.
Instead, we need some other way to extract their data.
You could, in principle, do that by hand using the typst query CLI and then
assemble the correct .pdfpc file yourself.
However, this tedious task is better solved by the polylux2pdfpc tool.
Installation
If you have Rust installed, you can simply run
cargo install --git https://github.com/andreasKroepelin/polylux/ --branch release
If you use Arch Linux btw, you can also install polylux2pdfpc from the AUR
package polylux2pdfpc-git
(thank you to Julius Freudenberger!)
Usage
You invoke polylux2pdfpc with the same arguments you would also give to typst compile when you wanted to build your slides.
For example, say you have a file called talk.typ in the folder thesis that
has some global utility files or so, you
would compile it using
typst compile --root .. thesis/talk.typ
and extract the pdfpc data using
polylux2pdfpc --root .. thesis/talk.typ
Internally, polylux2pdfpc runs typst query, collects all the pdfpc-related
metadata and then writes a .pdfpc file that equals the input file up to the
suffix.
In our example with thesis/talk.typ, we obtain thesis/talk.pdfpc.
Since typst compile produced thesis/talk.pdf, you can now simply open the PDF
in pdpfc:
pdfpc thesis/talk.pdf
and it will automatically recognise the .pdfpc file.
Changelog
0.4.0
After what must have felt like ages for everyone, we finally have a new release of Polylux! 🥳
Version 0.4.0 is now fit for Typst 0.12.0 and has become more streamlined. From now on, we rely on the Typst support for templates and the package does not ship builtin themes anymore. In the meantime, other packages for building slides in Typst have gained traction and it is a natural question why you should still use Polylux. Well, that I don't know. But I still use Polylux because I like a "non hacky" way of using Typst. Polylux has now taken on the policy that features are preferrably not implemented rather than implemented in hacky way, potentially relying on brittle internals of Typst and such. There is of course no rigorous definition for that so in the end it comes down to what I consider acceptable for myself. At the same time, I hope that other might share this view and can enjoy this new version of Polylux.
Some notable changes, besides the removal of themes:
- The dreaded
#pausewas removed in favour of#show: later. - There is a new
toolboxmodule exported by Polylux that contains many helpful elements for designing your own slides (some of them have previously been available in the now removedutilsmodule). - The book has been improved both in content and visuals.
- By changing the internal infrastructure for creating example previews, Polylux is finally considered a Typst repo by GitHub :D
- The Polylux repository now resides in a custom polylux-typ GitHub organisation.
- Polylux has a new logo. It's more elegant than the previous one although I know that some liked the silliness of the googly eyes...
I recommend going through the book and finding out how Polylux works now!
v0.3.0
- The previously existing module
helperswas transformed toutilsand now contains many more useful features. - The modules
logicandutilsare now directly accessible when importing Polylux (it was a bug that it did not work previously). - We finally have an ergonomic
#pausefunction that does not expect the user to keep track of some counter themselves. - The
#alternativesfunction has gained lots of friends that make specific situations a bit more convenient, namely#alternatives-match,alternatives-cases, andalternatives-fn. Also, there is a parameterrepeat-lastfor#alternativesnow. - Bullet lists, enumerations, and term lists now have custom functions to display
them dynamically:
#list-one-by-one,#enum-one-by-one, and#terms-one-by-one. - There is a new function
#fit-to-heightthat allows you to resize content to a given height (especially make it fill the remaining space on a slide!) Thank you to @ntjess for the initial implementation! - Previously, certain themes allowed you to easily put multiple content elements
next to each other.
This is now a commonly available function:
#side-by-side. You can use it regardless of any theme and the functionality was removed from the previously implementing themes. - Polylux now has special support for the pdfpc presentation viewer.
You can add speaker notes, hide slides, configure the timer, and more all from
within your Typst source file.
Thank you to @JuliusFreudenberger
for the inspiration and for creating the
polylux2pdfpcAUR package.